
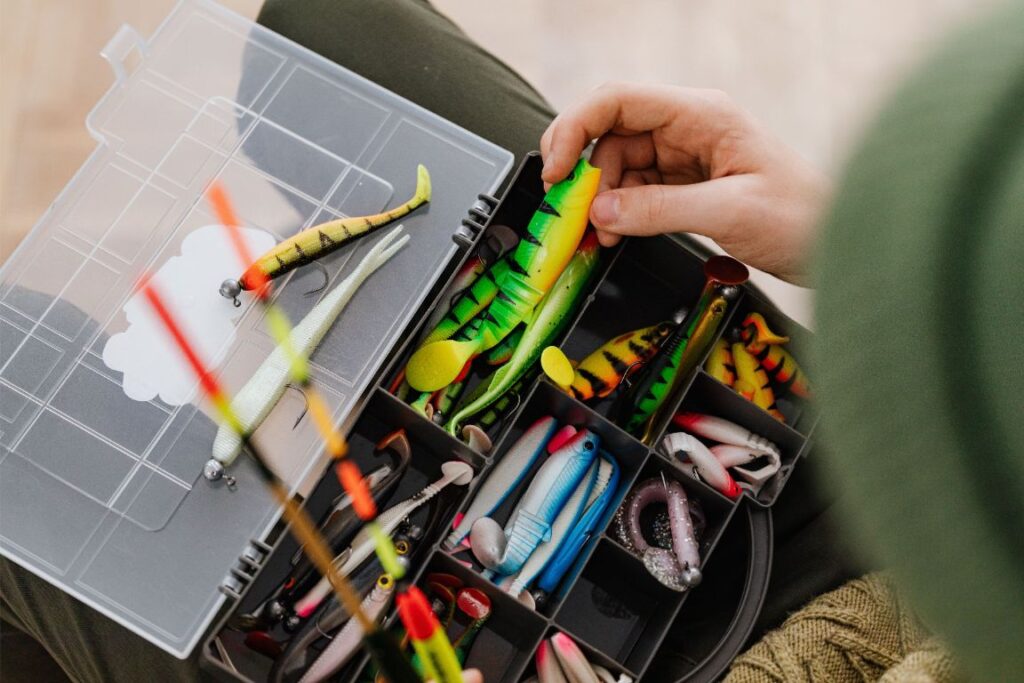
A fishing kayak gives you enough room to carry plenty of tackle.
That does not mean you should bring all of it.
One of the easiest ways to make kayak fishing frustrating is to cover the deck with tackle trays, loose plastics, tools, rods, bags, and accessories until there is barely enough room left to fish.
A better approach is to build a simple storage system around three questions:
- What do I need during this specific trip?
- What needs to remain within arm’s reach?
- What can stay behind the seat until I need it?
The goal is not maximum storage capacity.
It is fast access to the right equipment without creating unnecessary clutter.
If you are still planning the overall layout of your kayak, start with our How to Rig a Fishing Kayak guide. This article focuses specifically on tackle and fishing-gear storage.
Bring Less Tackle Than You Think You Need
Good kayak tackle organization starts before the kayak reaches the water.
Wired2Fish recommends scaling tackle down for the specific water and fishing conditions rather than trying to bring an entire tackle collection onto the kayak.
That is probably the single most useful storage principle.
Plan Around the Trip
Before packing, think about:
- target species
- season
- water depth
- water clarity
- cover
- weather
- techniques you realistically expect to use
If you are bass fishing a shallow grassy pond, you probably do not need the same tackle selection you would carry to fish deep offshore structure in a reservoir.
Create a Small Trip-Specific Selection
Instead of carrying full-size boxes containing every lure you own, choose several proven presentations for the day.
For example, a simple bass selection might include:
- soft plastics
- Texas-rig terminal tackle
- spinnerbait or bladed jig
- one or two crankbaits
- topwater lure
- a small finesse selection
That is enough to adapt to a large number of situations.
Organize Tackle by Technique
Random storage makes a small kayak feel even smaller.
Wired2Fish recommends organizing tackle into categories or presentations before deciding what should go onto the kayak. :contentReference[oaicite:1]{index=1}
Use Dedicated Trays
You might organize boxes into categories such as:
- terminal tackle
- crankbaits
- topwater
- jigs
- moving baits
This makes it much easier to grab the correct tray without opening every box you brought.
Keep Soft Plastics Simple
Soft plastics do not always need large hard boxes.
Original packages, compact soft-storage systems, or organized waterproof bags can work well.
Separate them by presentation or bait style so you are not sorting through a large mixed pile on the water.
Create Three Storage Zones
A practical fishing kayak can be divided into three basic storage zones:
- immediate-access zone
- secondary storage
- protected storage
This prevents everything from competing for the same small space.
Immediate-Access Zone
Keep equipment you use repeatedly close to the seat.
This may include:
- pliers
- line cutters
- one small tackle tray
- leader material
- frequently used soft plastics
- landing net
You should be able to reach these without turning dramatically or standing.
Secondary Storage
The rear tankwell or crate works well for tackle you need during the trip but not every few minutes.
Examples include:
- additional trays
- backup lures
- spare line
- extra tools
- secondary rods
Protected Storage
Items that need better protection can go inside:
- dry bags
- sealed compartments
- water-resistant boxes
- internal hatches where appropriate
This is particularly useful for electronics, keys, clothing, and other equipment you do not need constantly.
Use a Rear Kayak Crate
The rear tankwell is one of the most useful storage areas on many sit-on-top fishing kayaks.
A crate provides a removable container for tackle and accessories without filling the cockpit.
Wired2Fish notes that both ordinary milk crates and purpose-built kayak crates are commonly used for this job. :contentReference[oaicite:2]{index=2}
What to Store in the Crate
A simple crate can hold:
- two or three tackle trays
- soft plastics
- backup tools
- leader material
- small dry bag
- spare rod storage
Do not fill it merely because there is empty space.
Secure the Crate
Use the kayak’s:
- bungees
- straps
- factory tie-down points
to keep the crate from sliding or leaving the kayak during a capsize.
The crate should still be removable when needed.
Milk Crate vs Purpose-Built Kayak Crate
Both approaches can work.
Milk Crate
A simple milk-style crate is:
- inexpensive
- light
- easy to modify
- good at draining water
It is an excellent starting point if your kayak’s rear tankwell fits one securely.
Purpose-Built Kayak Crate
Fishing-specific crates may add:
- lids
- rod holders
- accessory mounting points
- better tackle-box organization
- additional weather protection
Wired2Fish notes that modern fishing crates increasingly include dedicated rod storage and configurable accessory mounts. :contentReference[oaicite:3]{index=3}
Which One Should You Choose?
Start with the simplest system that meets your needs.
If a basic crate securely holds your tackle, there is no requirement to replace it with an expensive purpose-built system.
Keep the Cockpit Clear
The area around your seat and legs should not become general storage space.
You need room to:
- paddle
- pedal
- cast
- land fish
- enter and exit
- respond quickly when conditions change
Avoid Loose Tackle Boxes
A loose tray on the deck can:
- slide
- open
- catch line
- block your feet
- fall overboard
Give every box a normal storage location.
Keep Loose Hooks Off the Deck
Small hooks, jig heads, and lures can quickly become a problem around:
- bare feet
- clothing
- PFD straps
- seat fabric
- fishing line
Return tackle to a tray or secure storage after using it.
Keep Tools Within Reach
Not every piece of fishing equipment belongs in the crate.
Pliers and cutters are good examples.
You may need them quickly when:
- removing a hook
- cutting line
- retieing
- dealing with tangled fishing line
Good Tool Locations
Useful options include:
- PFD pockets
- tool holders beside the seat
- short organized tethers
- small cockpit pockets
The exact position matters less than being able to reach the tool comfortably.
Store Rods Separately From Tackle
Rod storage deserves its own plan.
Do not simply push rods into the crate between tackle boxes.
That can make both the rods and the tackle harder to reach.
Our Kayak Rod Holder Setup guide covers vertical, horizontal, front, rear, and crate-mounted rod storage in more detail.
Keep Rod Handles Clear
Make sure tackle trays do not block the rod handles you need to grab from behind the seat.
Think About Overhead Cover
Vertical rods work well in open water.
Horizontal storage can be better around:
- trees
- docks
- small creeks
- standing timber
Protect Tackle From Water
Kayak gear will get wet sooner or later.
Even calm-water fishing can expose tackle to:
- paddle drips
- rain
- waves
- wet fish
- water entering the tankwell
Use Water-Resistant Storage Where Useful
Not every lure box needs to be completely waterproof.
But equipment that is particularly sensitive to moisture may benefit from sealed storage.
Dry Tackle After the Trip
Do not close wet lures inside a box and leave them there indefinitely.
Open damp boxes and allow equipment to dry.
This is especially important with metal hooks and terminal tackle.
Use Dry Bags for the Right Items
Dry bags are useful, but they are not ideal for everything.
Good Dry-Bag Items
Consider using protected storage for:
- keys
- spare clothing
- phone when not in use
- food
- certain electronics
Do Not Bury Frequently Used Gear
If you need an item ten times during a trip, putting it at the bottom of a rolled dry bag is inefficient.
Match storage protection to how often you actually use the item.
Organize for the Way You Fish
There is no universal tackle-storage layout because different anglers use their kayaks differently.
Bass Fishing
A bass setup may prioritize:
- several technique-specific trays
- soft plastics
- terminal tackle
- two or three rods
If you are building a bass-specific loadout, our Kayak Bass Fishing guide covers useful techniques and tackle choices.
Small Pond Fishing
You may need only:
- one rod
- one compact tray
- small bag of plastics
- pliers
There is little reason to bring a large crate of equipment when the launch is only a short distance away.
Longer Trips
Longer trips may justify additional:
- backup tackle
- food
- water
- weather gear
But keep those items separated from the small amount of tackle you are actively using.
Organize for Wind and Boat Control
Wind makes poor organization much more noticeable.
A drifting kayak is not the place to search through several boxes for one lure.
Keep your frequently used tackle easy to reach so you can make quick changes without losing control of the boat.
Our Kayak Fishing in Wind guide covers drift control and positioning in more detail.
Keep the Paddle Accessible
Never let tackle storage block your paddle.
You may need a quick correction before you have time to reorganize anything.
Do Not Overload the Kayak
Storage space is not the same thing as useful carrying capacity.
Every additional item adds weight.
Your total load can include:
- angler
- seat
- PFD
- rods
- tackle
- electronics
- battery
- water
- cooler
- anchor
Follow your kayak manufacturer’s capacity guidance.
Keep Heavy Items Low
Where possible, heavier equipment should stay:
- low
- secure
- close to the centerline
Do not stack unnecessary weight high above the deck merely because the crate can hold it.
Test Your Storage Layout Before Fishing
Your first layout probably will not be perfect.
That is normal.
Dry-Land Test
Sit in the properly supported kayak and practice:
- reaching tackle
- changing rods
- grabbing pliers
- reaching the net
- storing the paddle
On-Water Test
Take the kayak onto calm water before a long trip.
Notice:
- what you use constantly
- what is difficult to reach
- what you never use
- what gets in the way
Then simplify the setup.
Common Kayak Tackle Storage Mistakes
Bringing Everything
Choose tackle for the actual trip.
Leaving Boxes Loose
Give every box a secure location.
Keeping Tools Too Far Away
Pliers and cutters should be easy to reach.
Filling the Footwell With Gear
Keep the cockpit open for movement and boat control.
Ignoring Water Exposure
Dry tackle after wet trips and protect equipment that needs it.
Adding a Huge Crate Because It Fits
More capacity often encourages more unnecessary gear.
Putting Everything Behind the Seat
Frequently used tackle should not require constant twisting.
Changing the Layout Every Trip
A consistent system helps you reach equipment without having to think about where it is.
A Simple Beginner Kayak Tackle Setup
You do not need much.
Beside the Seat
- pliers
- line cutter
- one small active tackle tray
Rear Crate
- two additional tackle trays
- soft plastics
- spare leader material
- backup gear
Protected Storage
- keys
- phone when not being used
- extra clothing
Keep the paddle, landing net, and rods in their own dedicated positions.
That is enough for a large amount of fishing.
Frequently Asked Questions
What is the best way to store tackle on a fishing kayak?
Keep a small amount of frequently used tackle close to the seat and store backup tackle in a secured rear crate, hatch, or other dedicated storage area.
Do I need a kayak crate?
No, but a rear crate is a simple way to organize tackle on many sit-on-top fishing kayaks. Use the kayak’s existing storage if it already meets your needs.
Can I use a regular milk crate?
Yes, if it fits your kayak securely. Milk-style crates are commonly used because they are inexpensive, light, and allow water to drain.
How much tackle should I take kayak fishing?
Bring enough to cover the techniques and conditions you realistically expect during that trip. Avoid carrying your entire tackle collection simply because there is room.
Where should I keep pliers on a fishing kayak?
Keep them close to your seated position, such as in a PFD pocket, tool holder, or short secured tether where they can be reached quickly.
Should kayak tackle boxes be waterproof?
Not every box has to be fully waterproof, but kayak tackle is regularly exposed to spray, rain, and wet decks. Protect moisture-sensitive equipment and dry wet tackle after fishing.
Where should I keep soft plastics?
Compact original packages, organized bags, or purpose-built soft-plastic storage systems can work well. Keep only the selection needed for the trip.
Should tackle stay in front of or behind the seat?
Frequently used tackle should be easy to reach near the seat. Less frequently used backup tackle can stay in the rear tankwell or crate.
Final Thoughts
Good kayak tackle storage is mostly about deciding what not to bring.
Choose tackle for the specific trip.
Keep your most-used equipment within reach.
Move backup gear behind the seat.
Secure boxes and crates.
Keep the cockpit open.
And give every important item a predictable location.
The best kayak storage system is not the one that carries the most tackle.
It is the one that lets you change a lure, grab a tool, land a fish, and control the kayak without having to search through a pile of gear.
Start simple, fish the setup, and add storage only when you discover a real reason for it.